Regular work planner allows the user to create a non-shift duty work plan for employees, for whole department or for whole branch.
The regular work planner overview screen has three tabs. These tabs list the employees, departments and branches respectively. Regular work planner of an employee, department or branch can be opened by using the detail button after selecting the employee, department or branch from the list respectively.
Overview Screen : Lists the Employees, Departments and the Branches available.
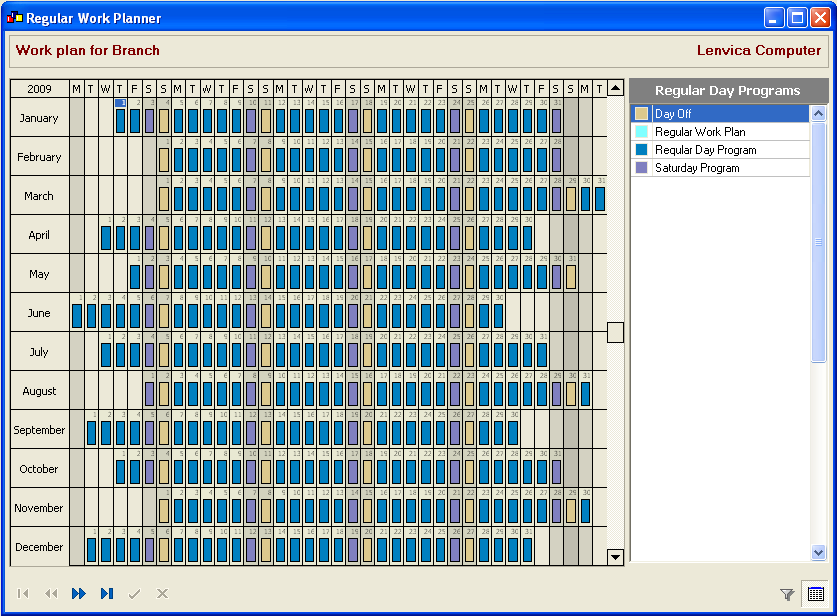
Detail Screen: Displays the Regular work plan defined for the employee, department or the branch.

The screen consists of three major components
-
The year calendar – The calendar provides a number of functionalities on this screen.
- Displays all the shift duties of the selected employee in read only mode. They are represented as shift day programs plotted against a period. These entries will have a '#' sign on the color bands on the calender. The legend is provided as a shift day program list. The shift duties cannot be modified from this screen.
- The regular duties of the selected employee are displayed as regular day programs plotted against the dates.
- Weekends are displayed in gray color, so that it is easy to understand the non-working days. An administrator user can specify the weekends in the Administration module.
- New regular day programs can be assigned against employees.
- Using the vertical scroll bar of the calendar, navigation through years is permitted
- Regular day programs list – Enlists all the available regular day programs. To create a regular work plan, these regular day programs are used.
-
Shift day programs list – Enlists all the available shift day programs. They are displayed here as legend for the entries on the calendar component.
Creating a regular work plan
Attend HRM provides the most easy way to create a regular work plan. After opening the detail screen for the regular work planner, some simple steps do the work.
-
Select the regular day program from the regular day program list. The selected day program will be highlighted.
-
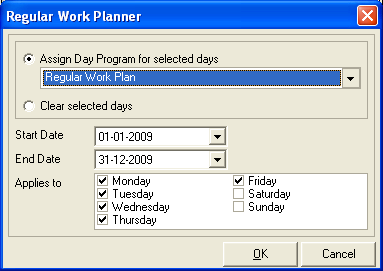
The period for which the regular day program is to be assigned can be selected as a range of dates using the click & drag functionality of the mouse. Click on the start date and drag the mouse until the end date. On releasing the mouse, the regular work planner data entry window will popup.

3. Modify the details in the data entry window if required. The details that can be modified are
-
Day program – The required regular day program can be selected from the list.
-
Start date
-
End date
-
Applies to – The days of the week are displayed here. By default all the days except the holidays including the weekends are selected. As per the requirement days can be selected or deselected.
4. On confirming the information, the day programs will be plotted on the calendar, against each every working day.
Note:
-
If there exists a shift duty plan for the employee for a certain period, during that period regular day programs cannot be assigned against the employee. For example, in the figure, Hakeem Iqbal has a planned shift duty period in the month of August and April. During this period, Attend HRM will not allow the user to assign regular day programs against Hakeem Iqbal.
-
You can create Work plan for coming years too. Use the scroll bar on the calendar to navigate between years.
-
The work plan associated with all the previous salary periods is read only. The regular day programs associated with those periods cannot be changed
-
The shift duty information on the calendar is read only. It cannot be modified.
A video of creating a Regular work plan is available in the video help file. It will be useful in understanding the creation of the regular work plan easily.
Copyright (c) 2003-2008 Lenvica Computer Solutions


