Employee Import functionality helps to import large amount of employee information into the database. This functionality makes sure that your old existing HR information is imported into Attend HRM without keying in again.
The steps involved in importing are as follows:
Step 1: Selecting the import
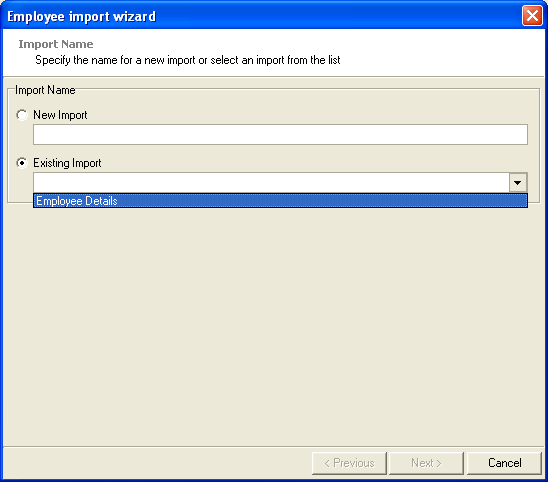
New import can be done by specfying a new name and matching the fields. Select an existing import from the dropdown to repeat an exisiting import. On selecting an existing import, the fields in import data file will be automatically matched with the Attend HRM database fields.
Step 2: Specifying the import file specifications
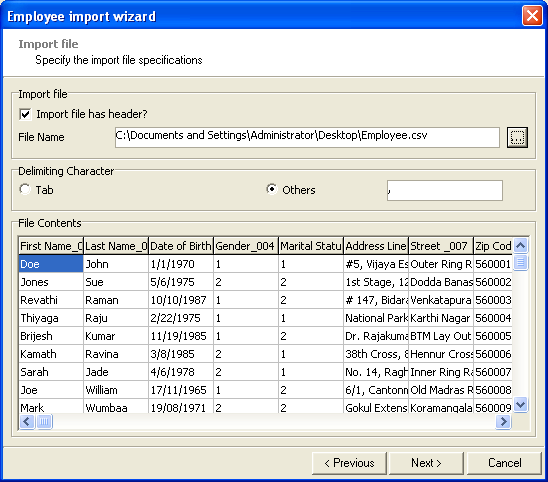
Wizard has the following information:
| File Name | Path of the file which is to be imported |
| Delimiting character | If Tab is clicked then delimitimg character is Tab, else if others is clicked then it has to be specified in the box |
| File Contents | The contents of the specified file is displayed |
Steps involved in specifying
- Select a valid data file to import. Attend HRM supports only two types of files; Text files (*.txt) and Delimited Files (*.csv).
- While selecting the file, the system will automatically identify the delimiting character, and display the file contents in the table. If found that the system has identified a wrong character, then the character can be specified manually. The file contents will be updated in the table.
- Click 'Next' button to proceed to the next stage.
Step 3: Field Mapping
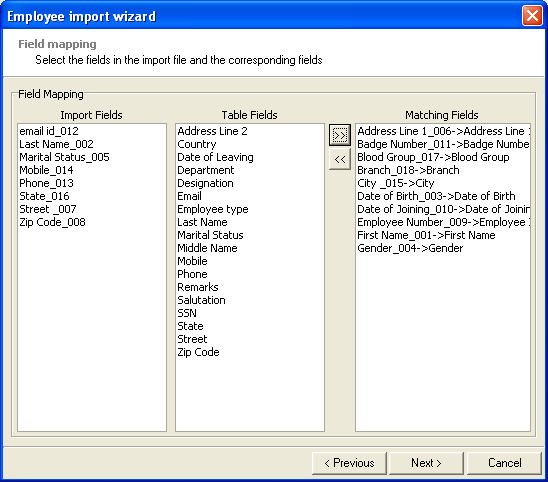
The Wizard has the followinf information:
| Import Fields | Fields in the import data file |
| Table Fields | Fields in the Employee data table in Attend HRM |
| Matching Fileds | Matching fields in Import data file and Employee data table |
This is a critical step. Here the contents of the import data file has to be mapped to the Employee data table in Attend HRM. The fields in the import data file is enlisted in the Import Fields list and the fields in the Employee data table are enlisted in the Table Fields list.
How to match the fields?
- Select a field in the Import Fields list.
- Select a matching field in the Table Fields list
- Click on the
 button to add the matching fields.
Similarly all the required fields can be matched.
Click on  button to
continue.
Step 4: Previewing Import data
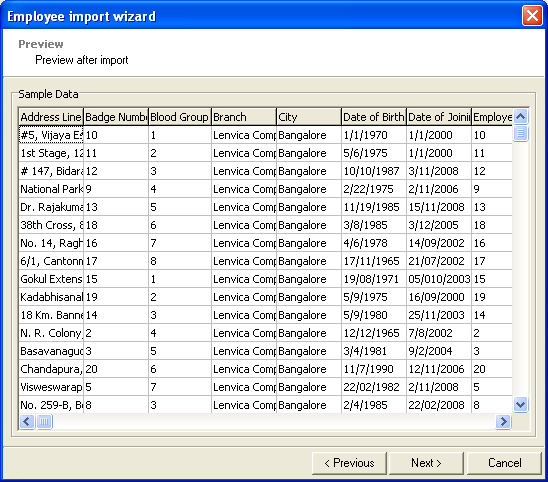
Import data can
be previewed now based on the Field mapping. The headings of the Sample Data table denotes the fields
in the Employee data table. These
fields curresponds to the fields on the Employee
Information screen.
Once the data is verified, click on the
 button to import the data.
Step 5: Status of the import process
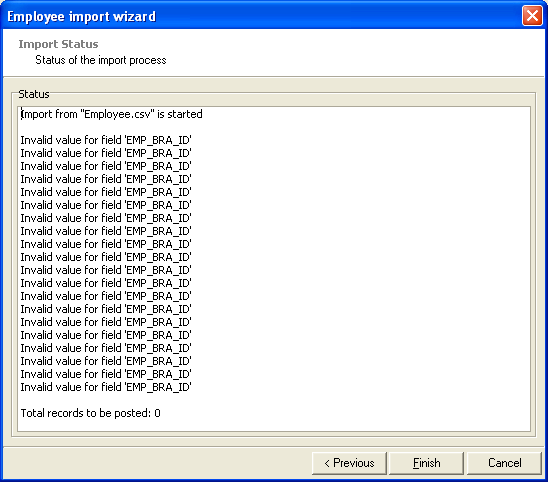
Screen displays the status of the import process. If the import is a success, then the total number of records posted will be displayed. If there are any records with error, those also will be displayed. In case of any unexpected databse errors, the process will be terminated.
The details of the import process can be viewd in the Log viewer in the Administration module, only by administrator.
Note: This functionality may be used with proper discrimination. It is to be made sure that data with duplicate nature is not being imported. This process is typically useful in the initial setup of the software, where existing data has to be imported from a third party software.
Copyright (c) 2003-2008 Lenvica Computer Solutions


